What to prepare before creating a live streaming?
Prepare the necessary tools.
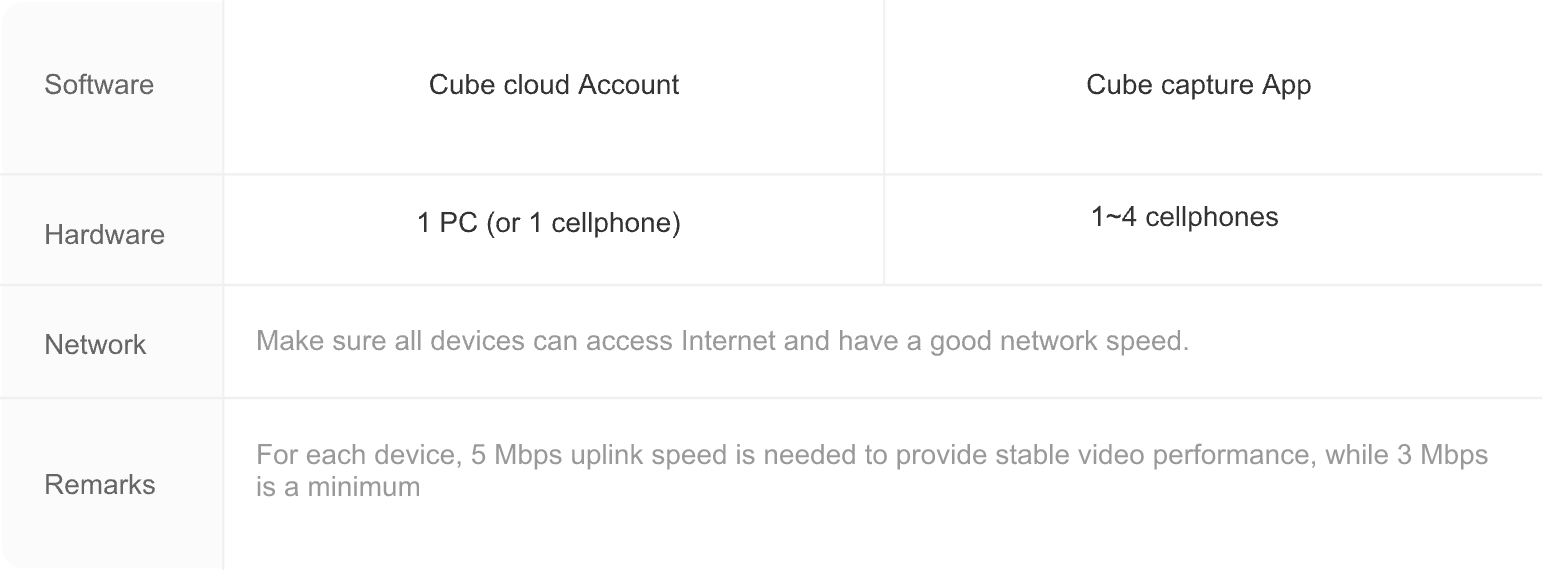
Software:
Mycube cloud (accessed in Web browser).
Mycube Capture App to capture video for a better video performance.
Hardware:
1 PC (or 1 cellphone) to control the live streaming by using Mycube cloud
Up to 4 cellphones to capture video
Network:
Make sure all devices can access Internet and have a good network speed.
Remarks:
For each device, 5 Mbps uplink speed is needed to provide stable video performance, while 3 Mbps is a minimum.
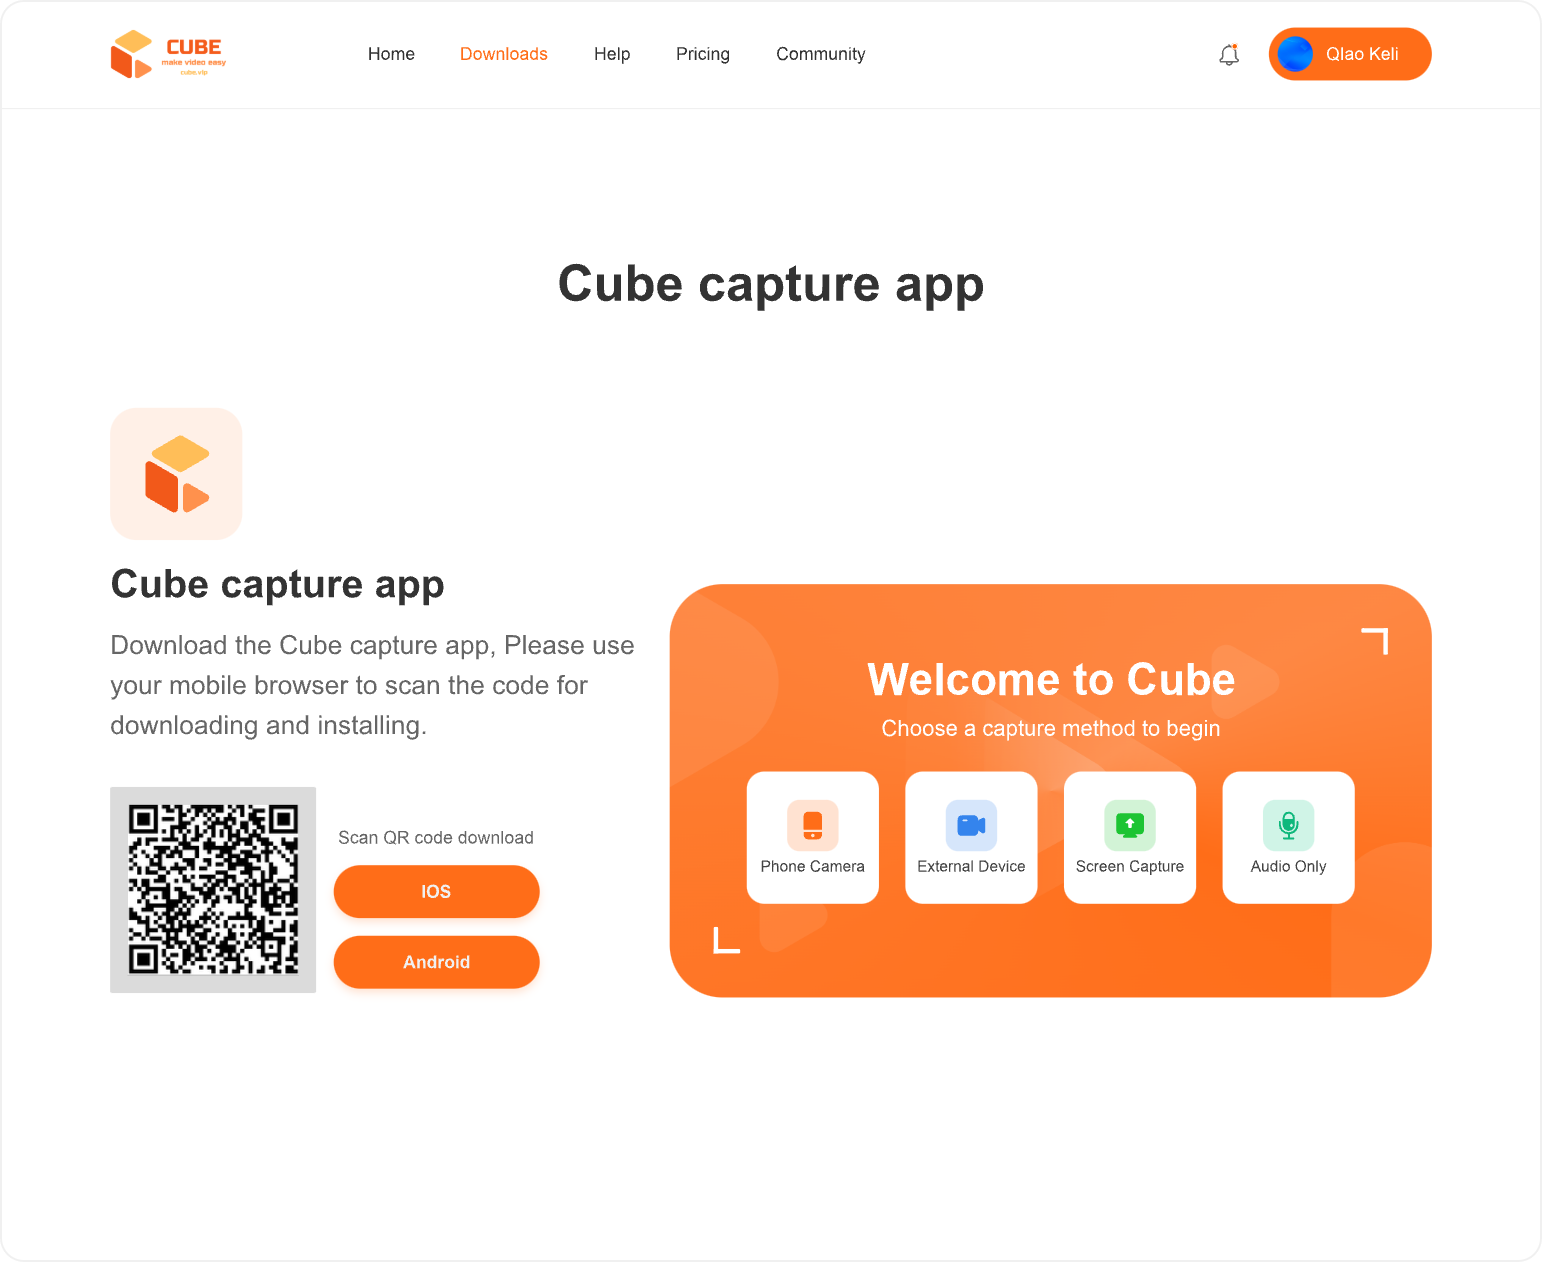
Step 1: Download the Mycube Capture App on your mobile phone.
Open the webpage https://www.mycube.tv choose the downloads, and use the prepared mobile capture device to scan the QR code for downloading and installing the Mycube Capture App. This will enable you to capture the screen for streaming during the live broadcast.
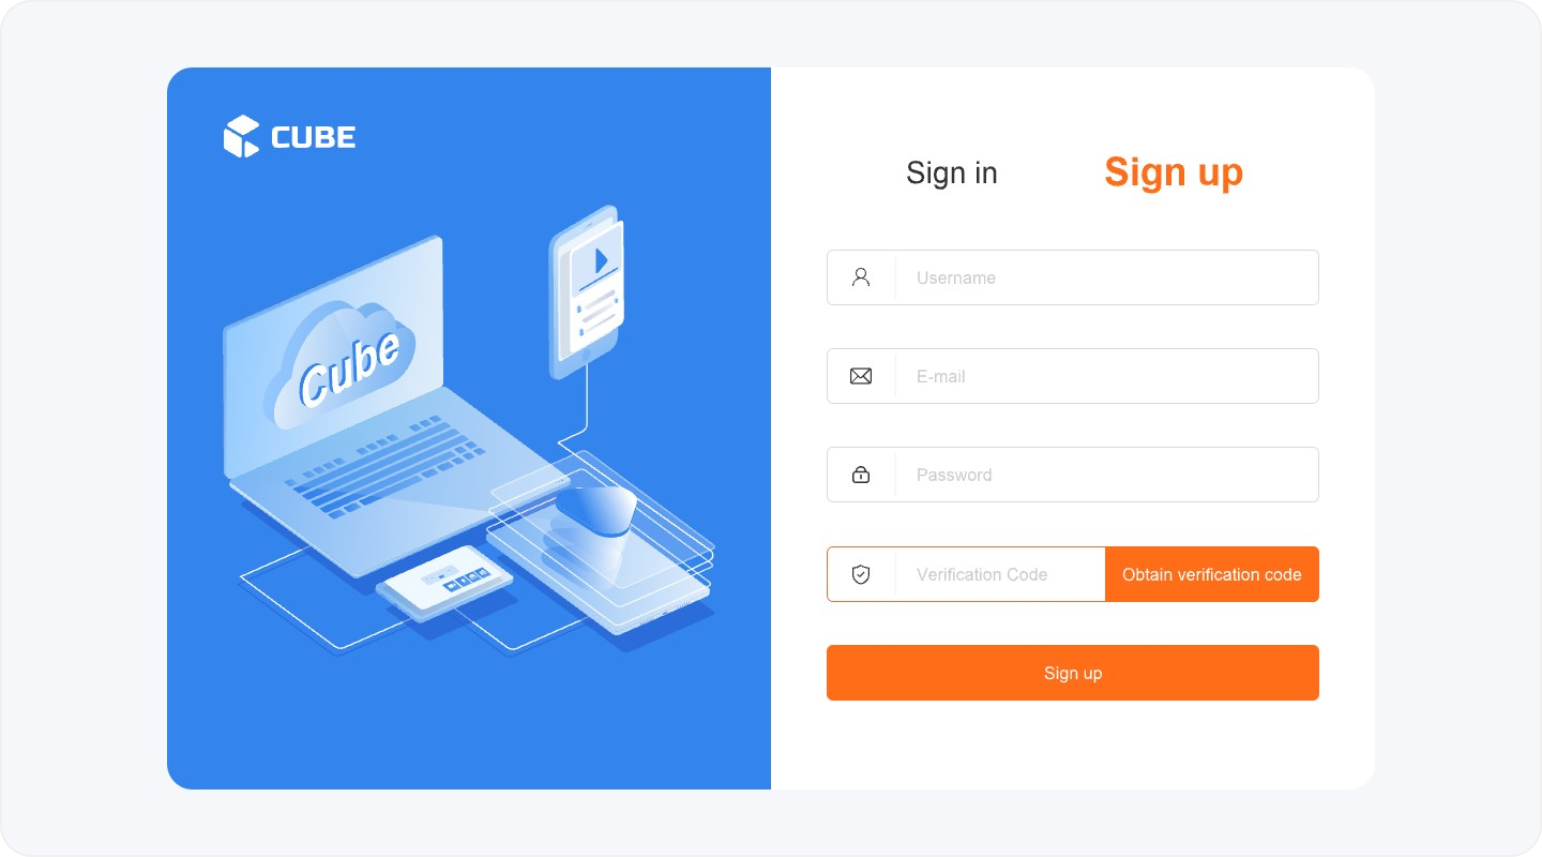
Step 2: Register a Mycube account
Open the webpage https://www.mycube.tv Select 'Sign up' to create a Cube Cloud System account.
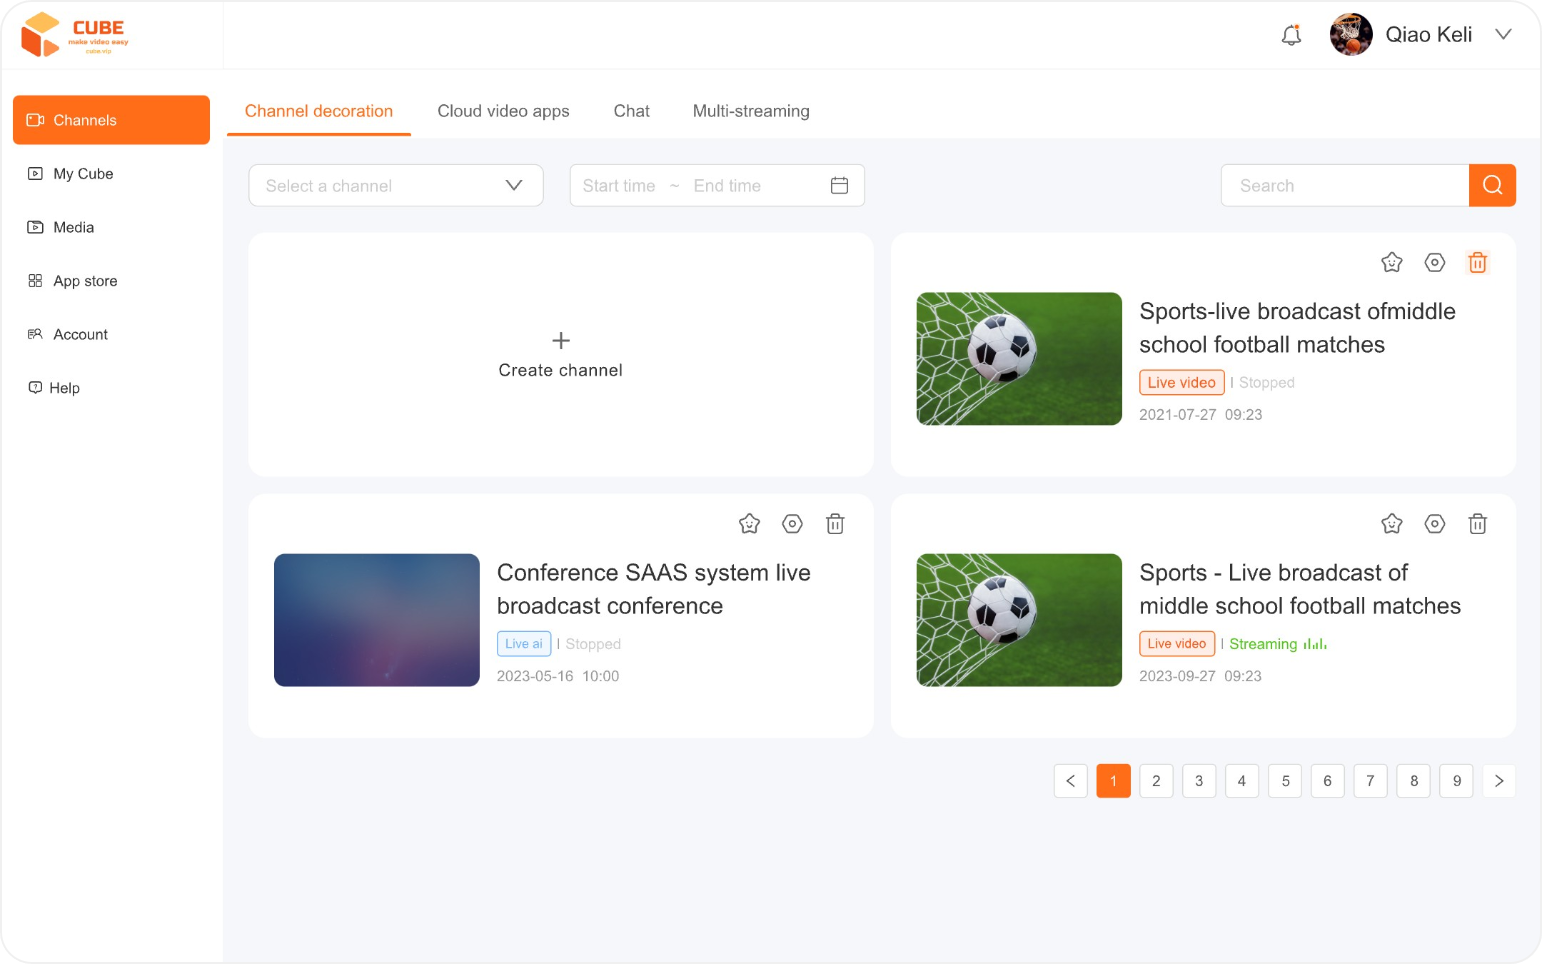
Step 3: Create a new Channel
Log in to the Mycube Cloud System account, go to the homepage channel page, and create a new channel.specifically for live streaming.
Step 4: Stream your content using a capture tool
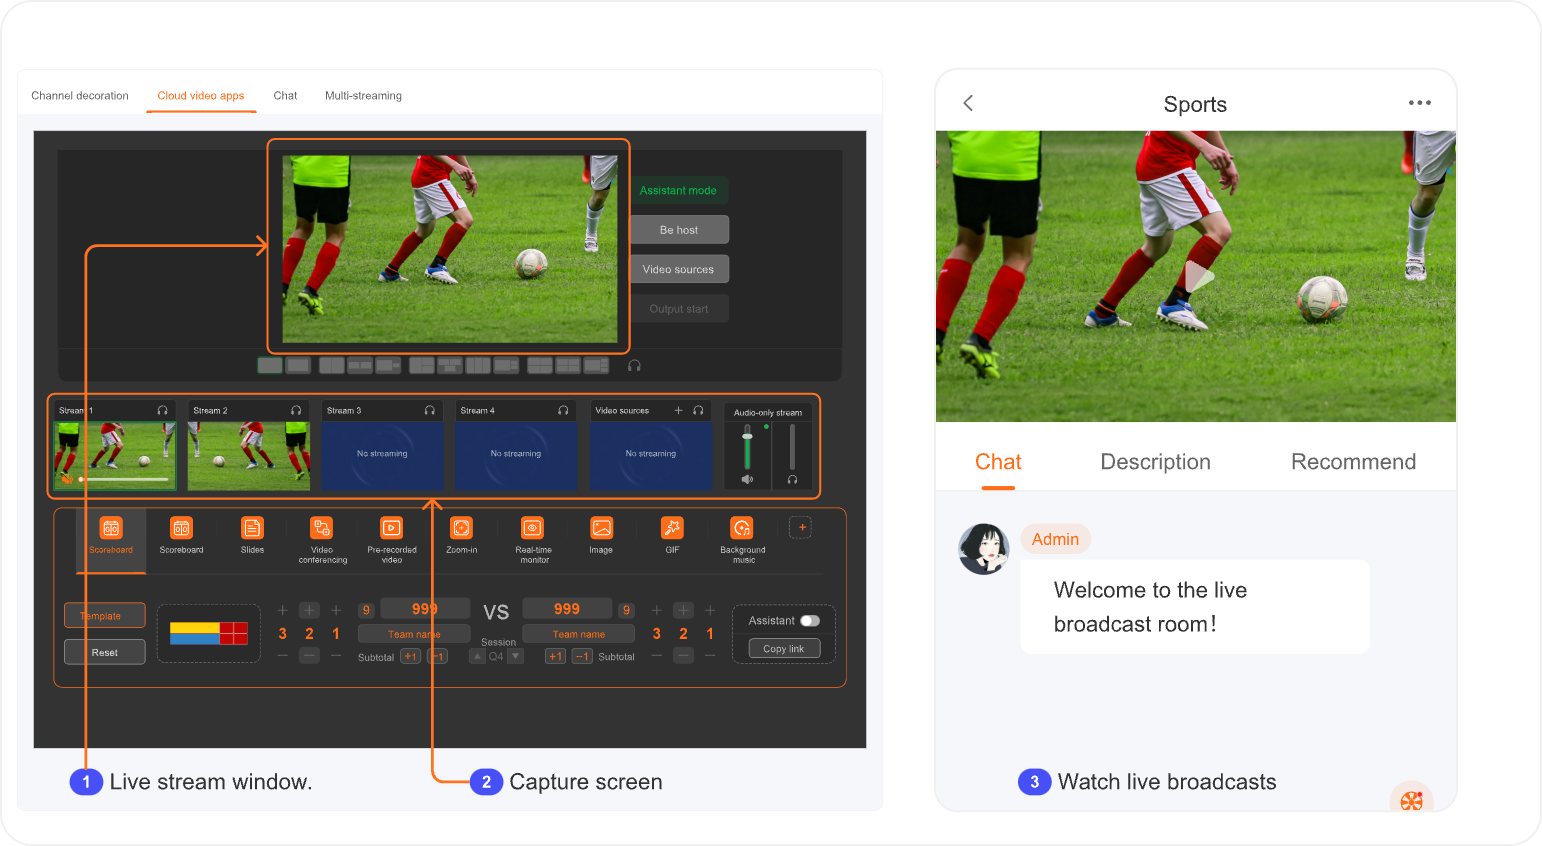
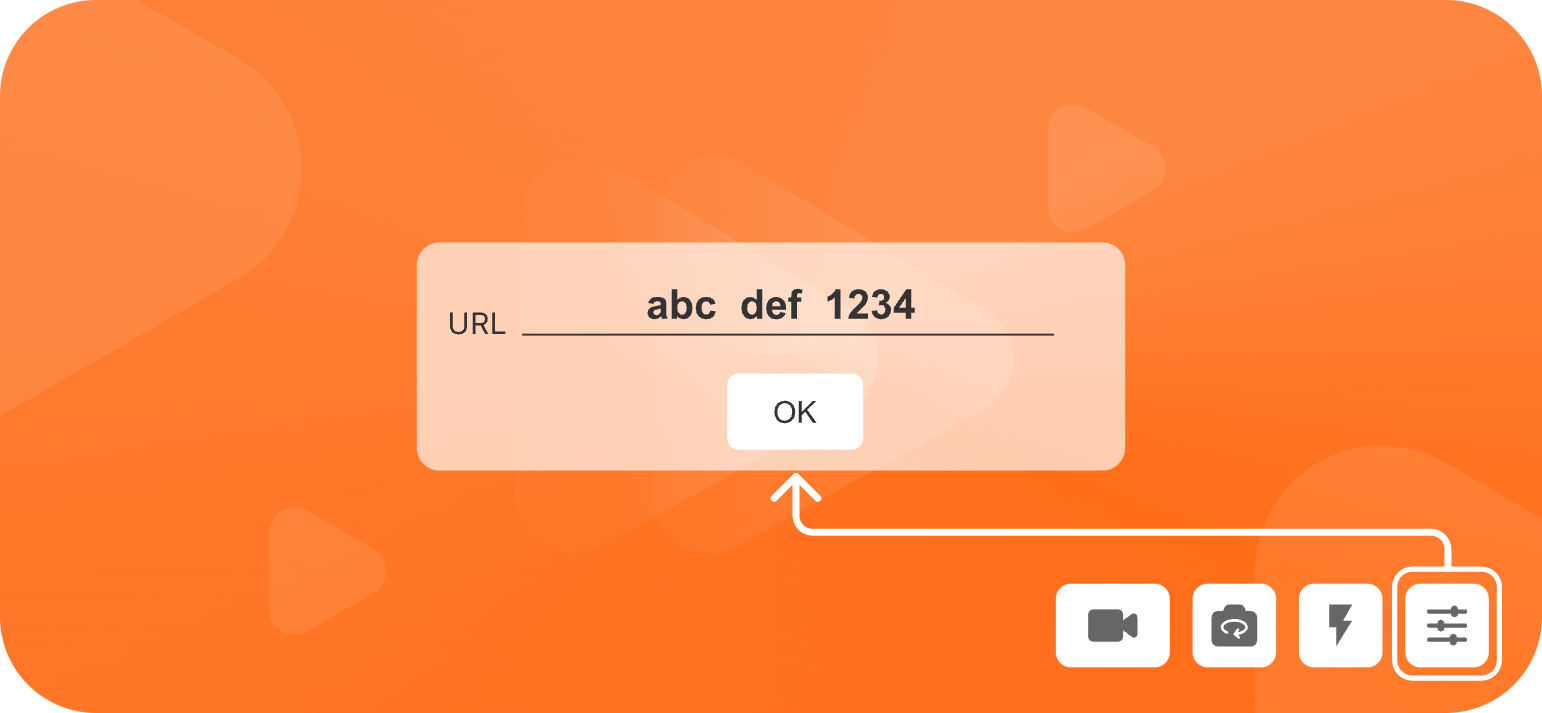
Access the newly created channel, select the streaming code, input it into the Mycube Capture App on your mobile device for capturing, then click OK to confirm and start streaming the visuals.

Summary on preparing live streaming:
- Make sure network is in good condition.
- Make sure devices have enough battery.
- Find the best locations/angles to place the capturing phones/devices.
- Use PC or mobile devices to log into Mycube cloud with Web browser and create a channel.
- Get into the channel, obtain/copy the streamcode. Set up the streamcode into Mycube Apps. Start streaming.
- In Mycube cloud (via Web browser) monitor video and audio quality for the streams, and control the live streaming.
How to quickly start a live streaming?
Step 1: Register a Mycube account
Access https://www.mycube.tv to sign in Mycube services and log into the account.
Step 2: Create a new Channel
Log in to the Mycube Cloud System account, go to the homepage channel page, and create a new channel.specifically for live streaming.
Step 3: Stream your content using a capture tool
Access the newly created channel, select the streaming code, input it into the Mycube app on your mobile device for capturing, then click OK to confirm and start streaming the visuals.
Step 4: Begin your live broadcast.
Check the video and audio quality on the cloud control room; once confirmed, initiate the live broadcast.
How to install mycube apps?
Download the Mycube Capture App on your mobile phone.
Open the webpage https://www.mycube.tv , choose the downloads, and use the prepared mobile capture device to scan the QR code for downloading and installing the Mycube Capture App. This will enable you to capture the screen for streaming during the live broadcast.

How to use the Mycube Capture App
Open the Mycube Capture App.
Stream your content using a capture tool
Access the newly created channel, select the streaming code, input it into the Mycube app on your mobile device for capturing, then click OK to confirm and start streaming the visuals.
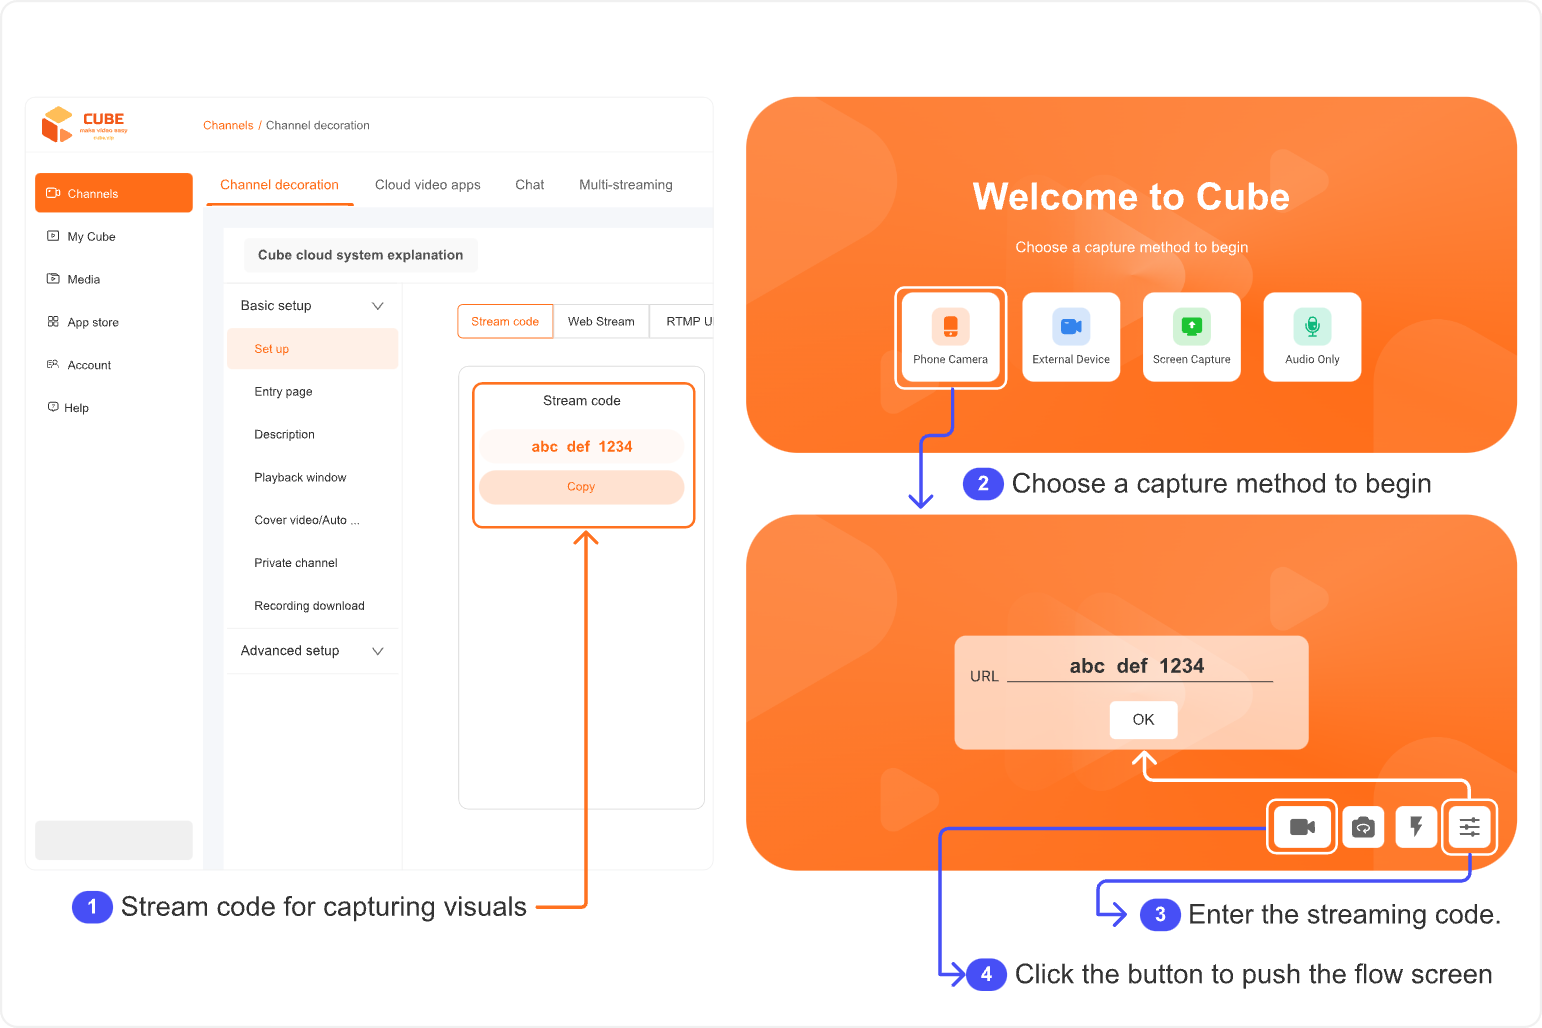
Enter the streaming code
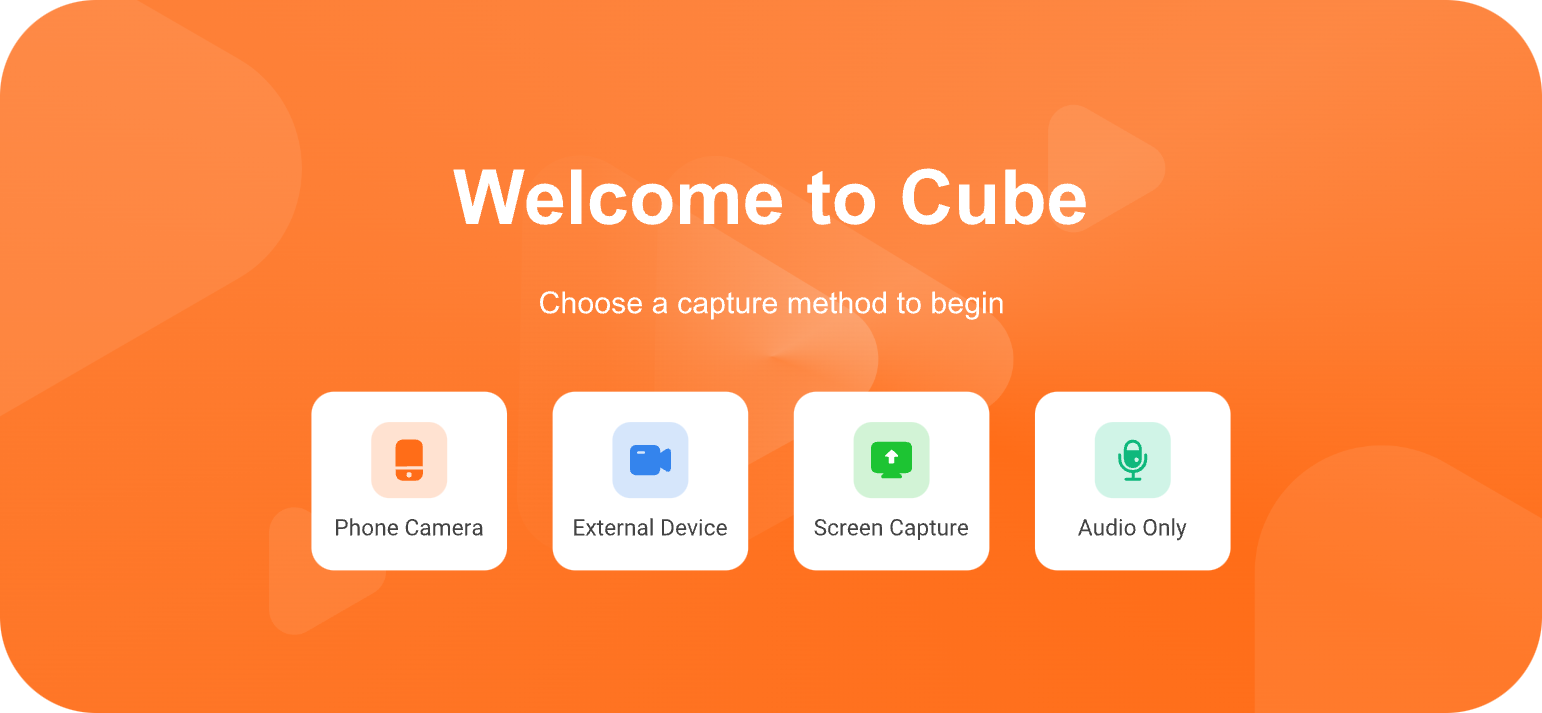
Phone Camera/External Device/Screen Capture/Audio Only
Summary on preparing live streaming
Make sure devices have enough battery.
How to use cloud control panel?
How to set up the home page?
How to use video editing tools?
How to use channel settings?
How to use the mobile version of the live cloud control panel?
